Building my Acorn Econet socket boxes
The Acorn Econet is a bus based network that runs over 5 wires. Two wires are used as Data +/-, two wires are used as Clock +/- and the fifth wire is used as a common ground.
Original Econet socket boxes are reasonably difficult to come by these days and they used punch down connections inside to attach each socket box to the network bus. Whilst the original Acorn design for the socket box is fantastic for fixed networks in business or school settings, I needed something a little more flexible that would allow me to build an ad hoc Econet network and allow me to extend or reduce the networks size relatively easily and so, I built my own.
Econet socket box wiring
The wiring for a socket box is straightforward enough, for each socket, pin 1 is wired to pin 1, pin 2 to pin 2, 3 to 3, 4 to 4 and finally pin 5 to pin 5.
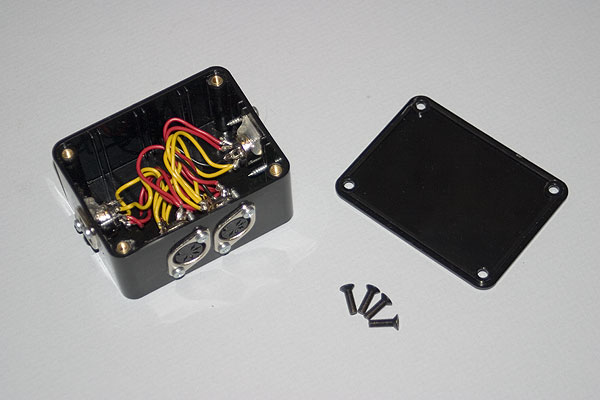
The practicalities of wiring the sockets and fitting them into a project box as you can see above means that the wires are pretty untidy and the whole process of wiring was quite a fiddly one. So I made some modifications to my subsequent socket box construction to aid in the speed of production and reduce the amount of fiddly work involved.
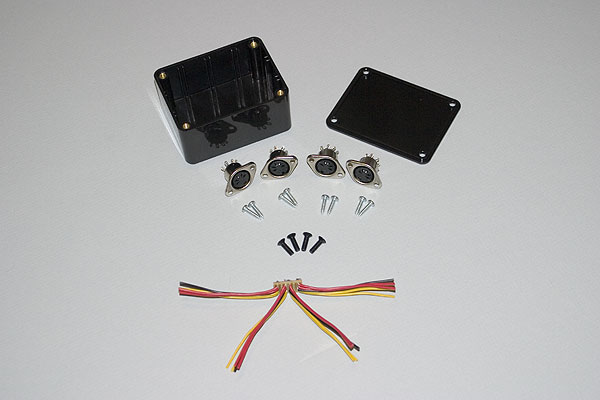
Parts for a socket box
As you can see from the photo below, the parts for the socket box are straightforward enough.
- 1 ABS project box (with screws)
- 4 x 5 pin din sockets
- 8 self tapping screws
- A small piece of veroboard
- Some wire
Constructing the socket box
To construct my "Mark 2" socket box, I pre construct a backplane to which I solder into place 20 short wires on five tracks. You could get away with a piece of Veroboard that is 5 tracks by 4 holes in size but I tend to use a slightly larger 5 tracks by 6 holes just to give a little more space.
Once the backplane is constructed and soldered up, I drilled the holes for the sockets and placed the backplane into the box with a set of 5 wires protruding from each hole. The process of then soldering each socket to the backplane is quick and easy to do.
Once the sockets are all soldered up, a quick continuity test with a multimeter can be performed to check the connections of each socket. If everything is working, I use a small amount of glue from a glue gun to fix the backplane into place in the box, and fit the self tapping screws to hold the sockets firmly in place.
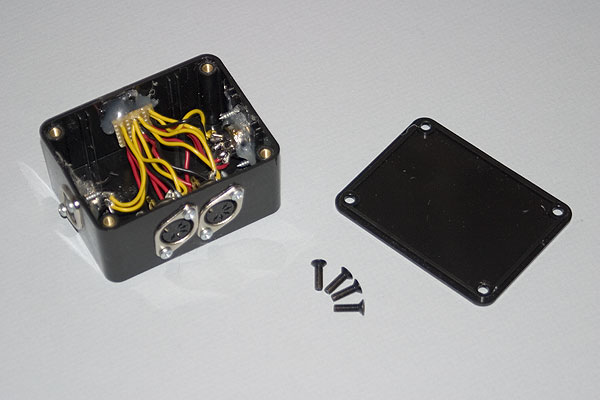
As you can see, the backplane is attached to the back wall of the socket box assembly and the box is tested and ready to assemble.
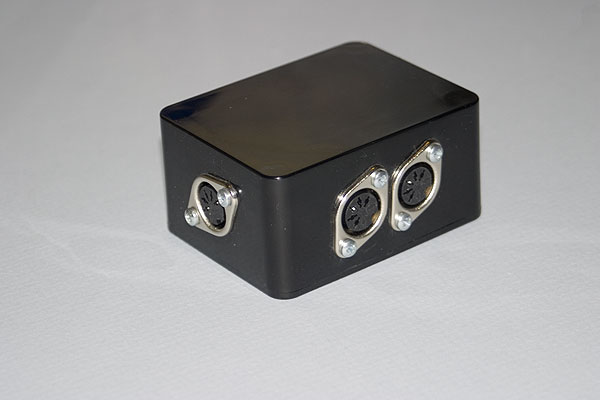
The finished article
Here is the finished article, fully assembled and ready to be used.