Slogger Pegasus 400 Disc Interface for Electron
The Slogger Pegasus 400 Disc Interface was a cartridge that was compatible with the Acorn Electron Plus 1 and the Slogger RomBox Plus expansions for the Acorn Electron that gave the Electron floppy disc capability. The official Acorn floppy disc interface, the Plus 3, provided a 3.5" floppy drive built into the expansion and used the ADFS file system. The Slogger Pegasus 400 disc interface however supported both DFS and ADFS by the fitting of suitable ROMs to the card and allowed a user to choose the type of floppy drive they attached to the standard 34-pin socket.
In 2009, several "New old stock" Pegasus boards were found dating from the 1980's of which, the board featured below is one and it was my pleasure to get to build the disc interface from components and wield my soldering iron once again.
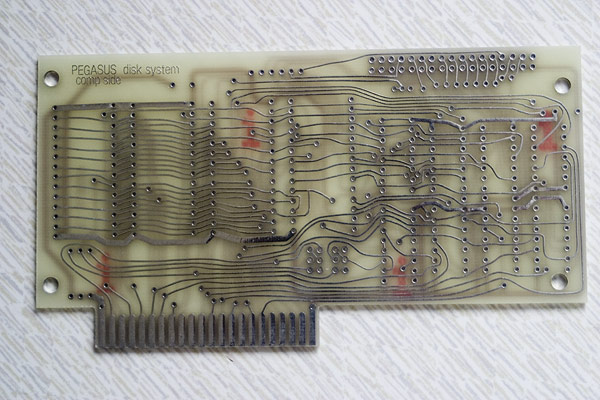
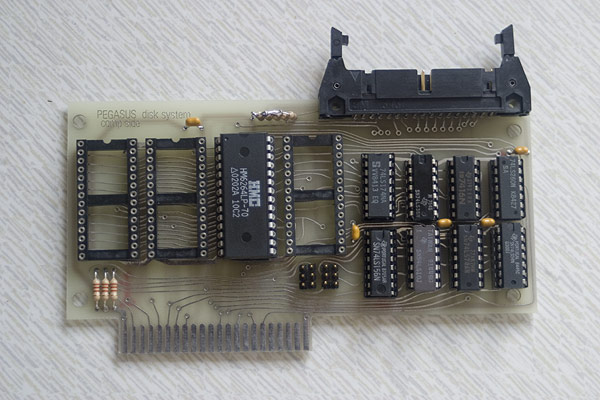
The Circuit board
So here we have the circuit board. It has no solder resist and the tracks are heavily tinned so soldering the board is trickier than a modern circuit board as the solder can have a tendency to "jump tracks" or follow the the track rather than flowing around a components leg so extra care has to be taken not to cause any shorts where the solder links tracks that shouldn't be linked.
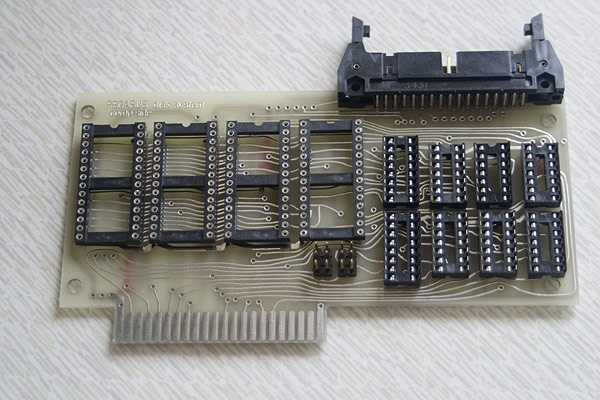
Placing the components
The first job in building the board is to place all the sockets and passive components. I tend to mock a board up with all the sockets to see what I'm aiming for and then solder them in one by one.
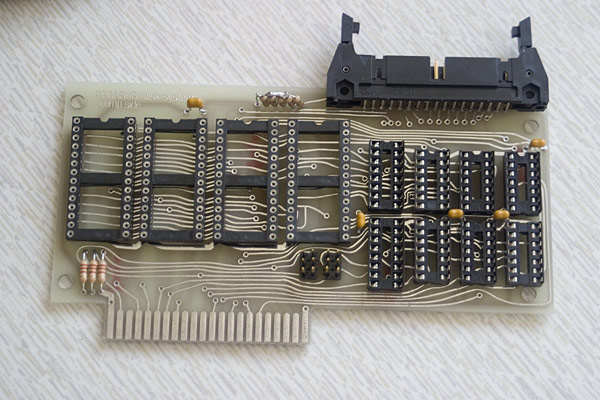
Passives all soldered
Once all the sockets are soldered in, I then move onto the passive components and below you can see the handful of resistors and ceramic capacitors required. I couldn't get hold of a 150R SIL resistor network in a timely fashion so I created my own with discrete components which can be seen top centre. Simple enough really.
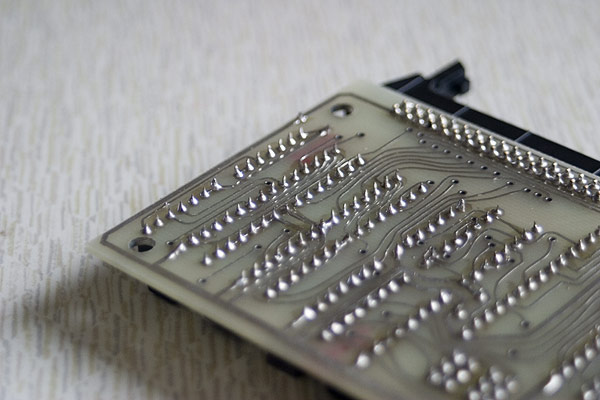
The solder side
So here's a shot of the solder side of the circuit board at the point of checking and before the chips were socketed. On this shot you can see that I missed one solder joint on the ground pin of the right most row of solder joints and if you look very, very carefully, you'll see there is a shorted track between pins 9 and 10 of the socket that the LS174 fits into. A little bit of solder wick can be used to clean up excess solder like this.
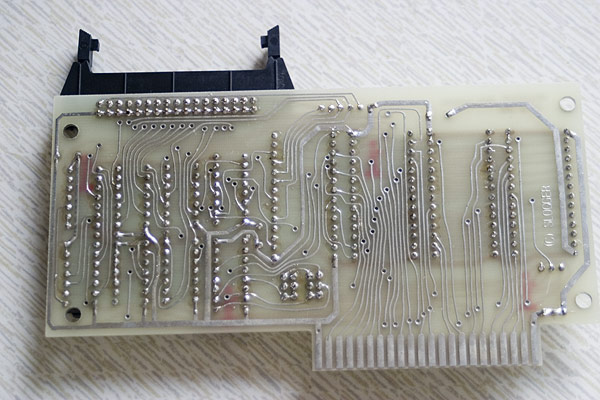
Now, a close up of my solder work. The short I mentioned previously looks to be more evident in this shot however, you can't actually see it at all. What you can see is the track that passes between the two pins going off to the right and "appearing" to link the two pins.
IC's fitted
Once all the soldering is competed and checked for issues, it's time to start populating the sockets with the components. the empty 28-pin socket on the right is for the WD 177x disc controller chip and the two sockets on the left are for suitable EPROM's, one of which needs to be the Slogger Pegasus 400 DFS ROM. The jumpers also need to be set to make use of the 8Kb of SRAM
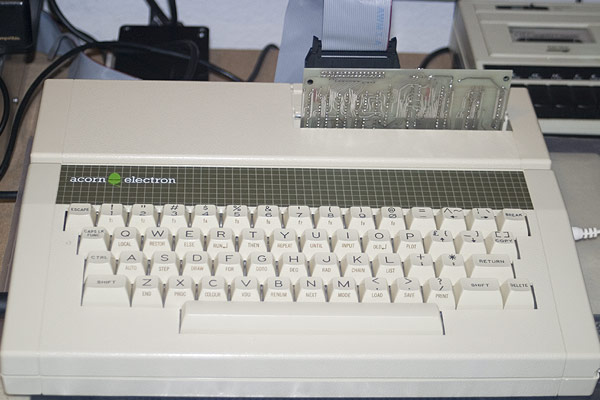
Fitted to the Acorn Electron Plus 1
Finally, once the circuit board was checked and sorted for any shorts, it was time to plug it in and test it out, so here we have my Acorn Electron and Plus 1 expansion, fitted with the Slogger Pegasus 400 disc interface connected to dual 3.5" floppy drives.
The Slogger Pegasus 400 in action
So here's my Slogger Pegasus 400's inaugural use. A simple formatting of a floppy disc. Enjoy!
Translate this site
Pegasus 400 resources
Acorn Electron
Acorn Electron Links
Stairway to Hell posts
- 8 - bit acorn hardware • Re: New 128KB model B FLASH ROM dev
- other vintage hardware, software and languages • Re: BBC Engineering Training Department Introduction to Microprocessors Part 1
- acorn & bbc micro user group (abug) events • Re: ABUG SOUTH (in person) 18 to 20 March 2022 (Tables needed)
- acorn & bbc micro user group (abug) events • Re: ABUG SOUTH (in person) 18 to 20 March 2022 (Tables needed)
- programming • Re: Cascading lines
provided courtesy of Stardot STH forums
